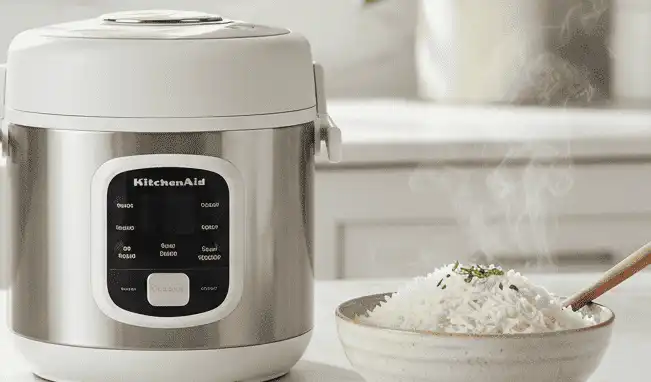
Featured Overview: The KitchenAid Grain and Rice Cooker
The KitchenAid Grain and Rice Cooker simplifies grain preparation through integrated load-sensing technology and automated liquid dispensing. By weighing dry ingredients directly in the pot, the machine calculates and dispenses the exact volume of water required for 21 distinct grain varieties.
This automated approach removes the guesswork of liquid-to-grain ratios, evaporation rates, and heat modulation. It delivers consistent texture across diverse grains, from delicate basmati to hearty whole-grain farro.
Core Capabilities:
- Integrated scale automatically measures dry grain weight.
- Top-mounted water reservoir automatically dispenses water at precise ratios.
- 21 programmed presets handle white rice, brown rice, ancient grains, and beans.
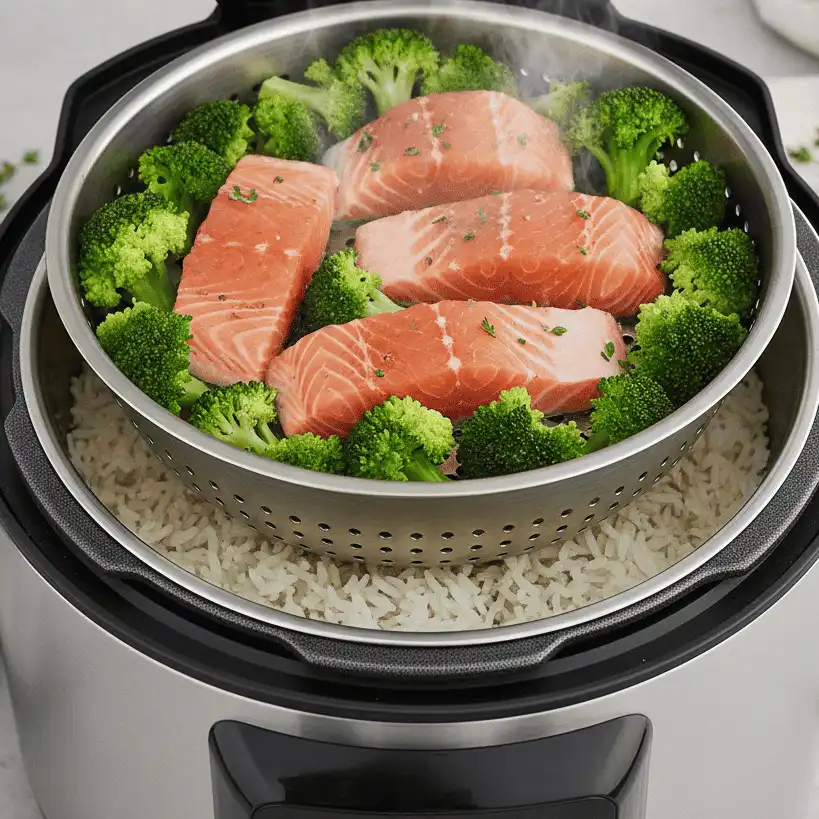
- Steam basket attachment enables simultaneous vegetable or protein cooking.
Introduction: Rethinking Countertop Grain Cooking
Cooking rice on a standard stovetop presents consistent challenges for home cooks. Minor fluctuations in burner temperature, pan thickness, and lid fit often lead to scorched bottoms or soggy grains.
Dedicated rice cookers solve these inconsistencies by managing heat through thermal sensors. KitchenAid advances this concept further by automating the measurement and liquid delivery steps entirely.
This guide serves home cooks, meal prep enthusiasts, and appliance shoppers evaluating the KitchenAid system. You will learn the underlying mechanics, ideal cooking workflows, maintenance requirements, and practical culinary techniques.
How the KitchenAid Rice Cooker Works
Traditional electric rice cookers rely on manual measurement. You measure dry rice with a plastic cup, rinse it, add water to an internal fill line, and press start.
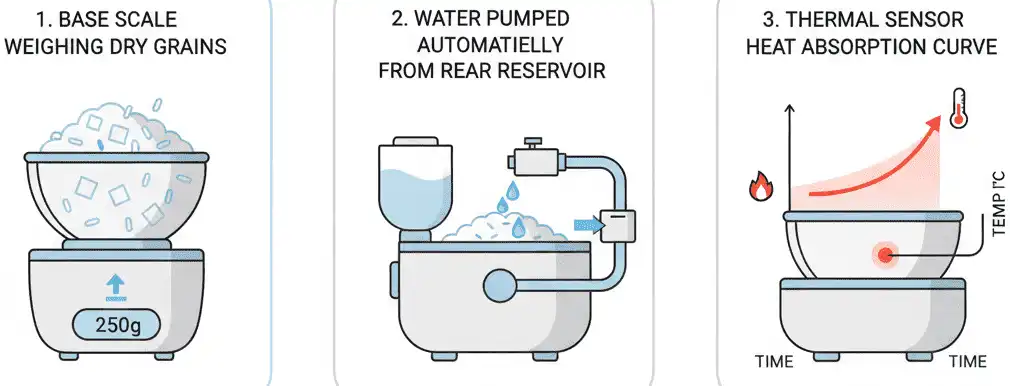
The KitchenAid Grain and Rice Cooker operates through an active sensing loop. A precision scale built into the base plate registers the dry weight of your grain inside the ceramic-coated pot.
Once you select your grain type from the digital menu, the internal microcontroller references a programmed liquid ratio. The machine then draws water from an external rear reservoir, pumping the exact volume needed directly into the pot.
The Absorption and Evaporation Phase
Rice cooking requires precise heat stages: soaking, rapid heating, simmering, boil-dry detection, and steaming. The internal heating element heats the pot until the water boils and grain starches gelatinize.
As the grain absorbs liquid and excess water turns to steam, the temperature inside the pot begins to rise above 212°F (100°C). Thermal sensors detect this specific temperature rise instantly.
The unit switches immediately from active cooking to a low-heat steaming cycle. This resting phase redistributes moisture through the grain core without scorching the base.
Core Features and Technical Specifications
Understanding the hardware components helps you use the appliance efficiently and keep it running smoothly over time.

1. Automated Water Dispenser and Reservoir
The rear-mounted water tank holds up to 48 ounces of filtered water. The internal pump meters water in precise milliliter increments based on the scale’s reading.
This feature allows you to pour arbitrary amounts of grain into the bowl without using measuring cups. The machine balances the water volume automatically.
2. Integrated Precision Scale
The base plate houses a digital load cell that tares the pot’s weight. It measures dry grains accurately from small single servings up to family-sized batches.
You can also use custom manual ratios if you prefer softer or firmer grain textures than the default presets provide.
3. Durable Ceramic Nonstick Pot
The inner cooking vessel uses a heavy-gauge metal core coated with a durable ceramic nonstick surface. It transfers heat evenly across the base and lower sidewalls.
The ceramic surface contains no PTFE, PFOA, or heavy metals. It releases sticky starches easily during cleanup.
4. Multi-Tier Steaming Basket
A specialized stainless steel steaming basket nests inside the upper rim of the cooking pot. This configuration lets you steam vegetables, seafood, or dumplings using the steam generated by the cooking grain below.
The machine includes dedicated steam-only modes for independent steaming tasks.
Step-by-Step Guide: Cooking Perfect Rice Every Time
Follow these steps to produce clean, separated, evenly cooked grains using the automated system.
Step 1: Rinse the Grains
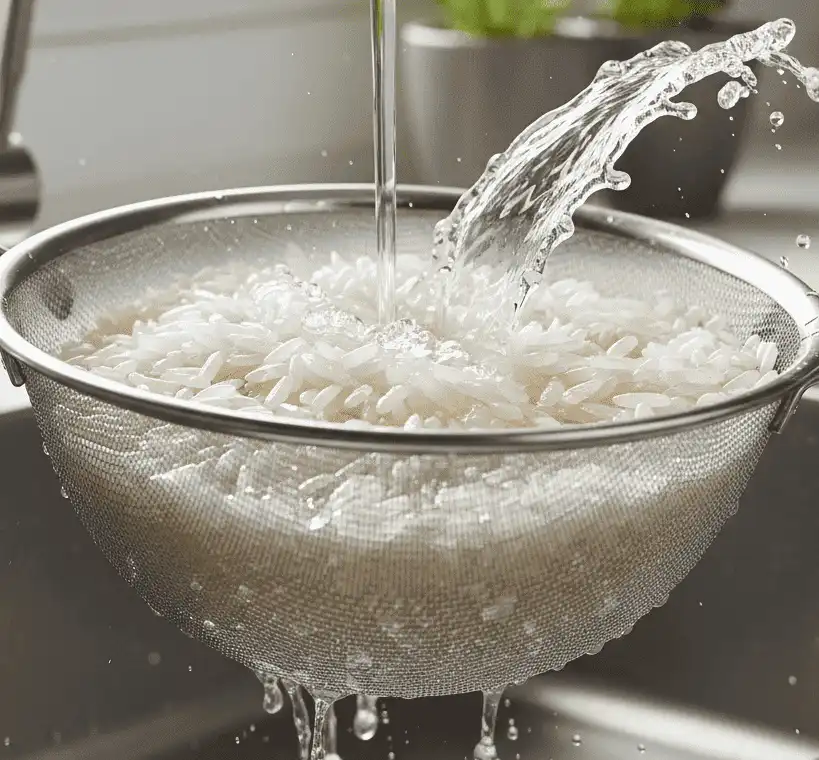
What: Place your dry grain into a fine-mesh colander and rinse under cold running water until the runoff is clear.
Why: Rinsing removes surface starches produced during milling. Leaving these starches in the pot causes bubbling, boiling over, and gummy grain texture.
How: Agitate the grains gently with your fingers under cold water for 60 to 90 seconds. Drain thoroughly to avoid adding unmetered water to the pot.
Common Mistake: Leaving excessive water in the colander after rinsing, which alters the cooker’s automated hydration calculations.
Pro Tip: Shake the strainer vigorously ten times to remove excess surface moisture before placing the grain in the cooker.
Step 2: Load the Pot and Check the Reservoir
What: Place the dry, rinsed grains into the cooking pot and verify the water tank is filled.
Why: The scale must read the grain mass before any water enters the cooking chamber.
How: Seat the cooking pot securely into the base unit. Fill the rear water tank with fresh, cold filtered water to the maximum line.
Common Mistake: Adding water manually to the pot before the machine weighs the grain.
Pro Tip: Always use cold filtered water in the reservoir to prevent mineral buildup in the internal pump lines.

Step 3: Select the Programmed Preset
What: Power on the unit and turn the control dial to your specific grain variety.
Why: Different grains require specific hydration ratios and heating profiles to cook properly.
How: Navigate the menu to choose presets like White Rice, Jasmine, Basmati, Brown Rice, Quinoa, or Oats. Press the control knob to confirm.
Common Mistake: Selecting generic “White Rice” for delicate aromatic varieties like Jasmine, which need slightly less water.
Pro Tip: Use the “Custom” mode if you are cooking heirloom grains not listed in the standard 21 presets.
Step 4: Active Cooking and Steam Venting
What: The machine pumps the calculated water volume into the pot, brings it to a boil, and monitors cooking progress.
Why: Automated heating curves ensure starches gelatinize thoroughly without boiling over.
How: Keep the lid closed and locked during this entire cycle. Allow the top steam vent to discharge moisture freely.
Common Mistake: Opening the lid mid-cycle to check progress, which vents steam and lowers internal temperature.
Pro Tip: Ensure at least six inches of clear space above the appliance to protect overhead cabinets from steam.
Step 5: The Post-Cook Rest and Fluff
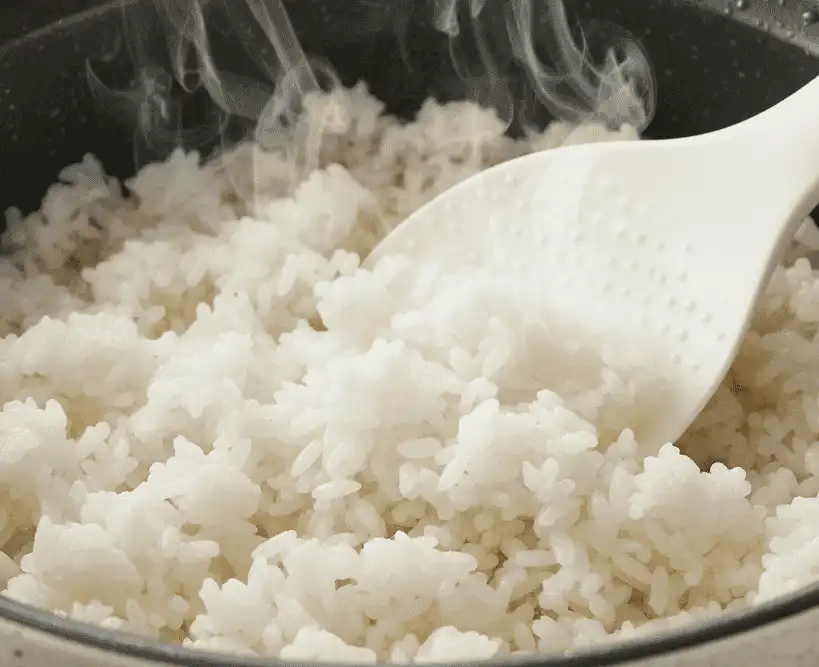
What: Allow the rice to rest in the pot for five minutes after the cycle ends, then fluff with a non-scratch paddle.
Why: Resting lets moisture equalize between the outer surface and center of each grain. Fluffing releases trapped steam and prevents clumping.
How: When the cooker chimes and switches to “Keep Warm,” wait five minutes. Open the lid and slice through the rice using a lifting motion with a silicone paddle.
Common Mistake: Smashing the cooked grains downward with a metal spoon, which crushes the grain structure and scratches the ceramic coating.
Pro Tip: Cut into the rice in quadrants, lifting from the bottom of the pot to turn the grains over gently.
Master Grain Cooking Chart
The table below outlines operational parameters for popular grains cooked in the KitchenAid automated system.
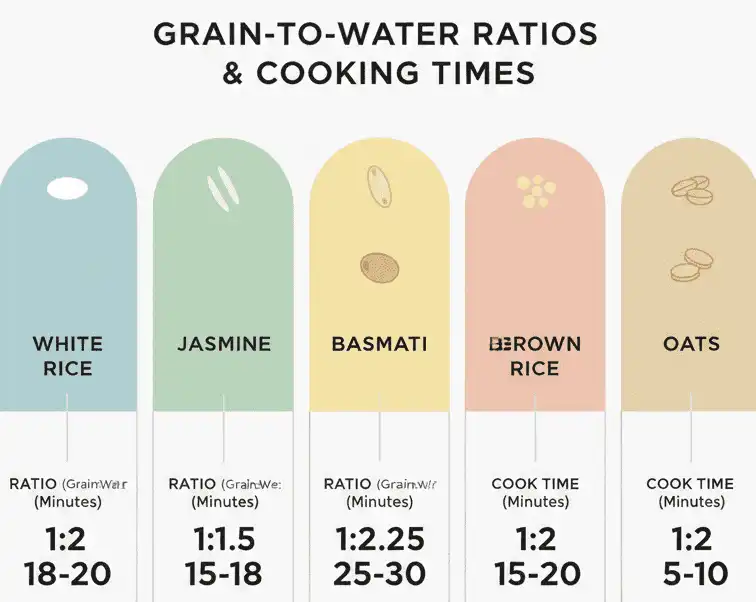
| Grain Variety | Rinse Required? | Default Ratio (Water:Grain) | Approx. Cook Time | Finished Texture |
|---|---|---|---|---|
| Long-Grain White | Yes (Thorough) | 1.5 : 1 | 25–35 min | Fluffy, distinct grains |
| Jasmine Rice | Yes (Gentle) | 1.3 : 1 | 22–30 min | Soft, slightly clinging, aromatic |
| Basmati Rice | Yes (Thorough) | 1.4 : 1 | 25–32 min | Long, dry, separate grains |
| Short-Grain Sushi | Yes (3–4 rinses) | 1.2 : 1 | 30–40 min | Tender, sticky, cohesive |
| Long-Grain Brown | Yes (Light) | 2.0 : 1 | 45–60 min | Chewy, nutty, firm bran |
| White Quinoa | Yes (Removes saponin) | 1.8 : 1 | 20–28 min | Light, popped germ ring |
| Steel-Cut Oats | No | 2.5 : 1 | 35–45 min | Creamy base, al dente cut |
| Whole Farro | Yes (Light) | 2.2 : 1 | 40–50 min | Dense, toothsome, nutty |
KitchenAid vs. Leading Competitors
Here is how the KitchenAid Grain and Rice Cooker compares against other premium countertop cookers.
| Feature / Metric | KitchenAid Grain & Rice | Zojirushi Neuro Fuzzy | Instant Pot Pro (Pressure) | Cuckoo Induction Heating |
|---|---|---|---|---|
| Water Dispensing | Fully Automated (Tank) | Manual Fill to Line | Manual Measuring Cup | Manual Fill to Line |
| Built-In Scale | Yes (Integrated base) | No | No | No |
| Heating Method | Calrod Element + Sensors | Micom Logic Element | High-Pressure Base Element | 3D Induction Heating (IH) |
| Inner Pot Material | Ceramic-Coated Aluminum | PTFE Nonstick Aluminum | Tri-Ply Stainless Steel | Stainless Steel / X-Wall PTFE |
| Preset Variety | 21 Grains, Beans, Oats | 8 Rice-Focused Presets | Pressure/Slow/Grain Multi | 14+ Rice/GABA/Multi |
| Best Use Case | Hands-off multi-grain cooking | Japanese short-grain perfection | Speed and one-pot stews | GABA rice & Korean cuisine |
Expert Techniques and Culinary Edge Cases
These advanced techniques help you get the most out of your cooker across special ingredients and cooking conditions.
Cooking with Broth, Stocks, and Fats
Warning: Never put bone broth, vegetable stock, coconut milk, dairy, or wine into the rear water reservoir. These liquids will foul the internal pump, leave residue, and harbor bacterial growth.
To cook rice in flavorful liquids, use the cooker’s Manual Mode:
- Leave the rear water tank empty or keep the automatic water feature toggled off.
- Place your dry, rinsed grain into the ceramic pot.
- Pour your seasoned broth or liquid directly over the grains using the measured ratios from the grain chart above.
- Whisk in fats like butter or olive oil directly in the pot.
- Select your grain preset and start the cycle. The machine will heat and monitor the pan using its base thermal sensor.
High-Altitude Cooking Adjustments
Water boils at lower temperatures at elevations above 3,000 feet (914 meters). Atmospheric pressure drops reduce thermal transfer, which can leave whole grains undercooked.
To compensate at high elevations:
- Select the “Custom Ratio” function on the digital interface.
- Increase the water ratio by 5% for every 1,500 feet above sea level.
- Allow an extra 5 minutes of resting time on “Keep Warm” before opening the lid to ensure complete starch hydration.
Steaming Proteins and Grains Simultaneously
You can steam proteins like fish fillets, shrimp, chicken tenders, or tofu in the upper basket while cooking rice below.
Because delicate proteins cook faster than long-grain or brown rice, add the steam basket during the cycle rather than at the start:
- Start your grain cycle normally.
- Wait until the on-screen countdown reaches the final 10 to 12 minutes.
- Open the lid carefully, insert the loaded steam basket using heat-resistant mitts, close the lid, and let the cycle complete.
Common Mistakes and How to Avoid Them
Avoid these common mistakes to maintain consistent results and protect your appliance.
1. Adding Liquids Directly to the Water Tank
The Mistake: Adding soy sauce, broth, oils, or flavorings to the rear water reservoir.
Why It Happens: Users want to infuse flavor into the grain automatically.
How to Avoid: Keep only pure filtered water in the reservoir. Always add spices, aromatics, bouillons, and sauces directly into the ceramic pot with the dry grain.
2. Neglecting the Condensation Collector and Steam Cap
The Mistake: Leaving the removable lid gasket and steam vent unwashed across multiple uses.
Why It Happens: The components are hidden inside the upper lid housing.
How to Avoid: Pull off the inner aluminum cover and steam vent cap after every two to three uses. Wash them in warm soapy water to prevent stale odors.
3. Using Metal Utensils Inside the Pot
The Mistake: Serving rice with stainless steel spoons or metal ladles.
Why It Happens: Grabbing standard kitchen silverware during meal service.
How to Avoid: Use only silicone, wood, or smooth composite paddles. Metal edges can scratch the ceramic coating, causing rice to stick over time.
Cleaning, Descaling, and Maintenance
Regular maintenance keeps the internal sensors and water lines working accurately.

Daily Cleaning Protocol
- Inner Pot: Wash with warm water, mild dish soap, and a non-abrasive sponge. While dishwasher-safe, hand washing preserves the ceramic surface longer.
- Removable Inner Lid: Pull the silicone release tab to detach the inner lid plate. Wash away collected starch residue and dry thoroughly before reinstalling.
- Steam Vent: Twist the top vent cap counterclockwise, rinse out accumulated moisture, and snap it back into place.
- Exterior Body: Wipe the matte finish and digital touch screen with a damp microfiber cloth. Never submerge the main housing in water.
Descaling the Internal Water System
Mineral scale from tap water accumulates inside internal pump lines over time, which can slow water delivery and affect the scale’s precision. Descale every three to six months:
- Fill the water reservoir with a 1:1 mixture of distilled white vinegar and cold water (or food-grade citric acid solution).
- Place the empty ceramic pot on the base plate.
- Run the machine’s dedicated “Clean / Descale” cycle from the settings menu.
- Discard the discharged vinegar solution from the pot once the cycle completes.
- Fill the reservoir with fresh distilled water and run two rinse cycles to flush any remaining vinegar taste.
Recommended Tools and Accessories
These kitchen tools complement the KitchenAid Grain and Rice Cooker workflow:
- Fine-Mesh Grain Colander: A stainless steel colander with sub-millimeter perforations prevents small grains like quinoa or teff from falling through.
- Silicone Standing Rice Paddle: Keeps the serving blade elevated off the counter to maintain kitchen hygiene.
- Airtight Grain Storage Containers: Protects bulk grains from humidity, dust, and pests to maintain stable moisture levels before cooking.
- Food-Grade Citric Acid Powder: An odorless descaling alternative to distilled white vinegar for routine system maintenance.
Related Cooking Guides
Expand your grain cooking skills with our related guides:
- How to Cook Fragrant Jasmine Rice: Stovetop vs. Cooker
- The Complete Guide to Brown Rice Water Ratios and Hydration
- Ancient Grains Master Guide: Farro, Spelt, Kamut, and Barley
- Batch Cooking and Freezing Rice for Weekly Meal Prep
- How to Descale Small Kitchen Appliances Safely
Authority References
For further reading on grain safety, starch chemistry, and appliance standards:
- USDA Food Safety and Inspection Service (FSIS): Safe cooking and storage temperatures for cooked rice and grain dishes.
- Whole Grains Council: Processing definitions, bran-to-germ ratios, and nutritional profiles of ancient grains.
- National Sanitation Foundation (NSF International): Sanitation standards and material safety ratings for food-contact small appliances.
Summary of Core Principles
- Trust the Load Cell: Add rinsed, well-drained grains directly to the dry pot without measuring cups. The machine balances the water volume.
- Protect the Water Reservoir: Fill the rear tank with clean, cold water only. Add broths, fats, and seasonings directly into the cooking pot.
- Always Rinse Grains: Rinsing removes loose surface starches, preventing sticky grains, pan boil-overs, and clogged steam vents.
- Allow the 5-Minute Rest: Let the cooked grain sit untouched on “Keep Warm” for five minutes before opening the lid to ensure uniform moisture.
- Maintain Internal Lines: Descale the reservoir and pump system every few months to prevent mineral buildup and maintain accurate water dispensing.

The KitchenAid Grain and Rice Cooker bridges the gap between everyday convenience and culinary precision. By combining automated water dosing with dedicated grain profiles, it delivers consistent results across everything from weeknight jasmine rice to hearty whole grains.
Frequently Asked Questions
How does the KitchenAid rice cooker know how much water to dispense?
The base of the machine contains an integrated digital scale. When you add dry grains and select a preset, the internal computer calculates the dry mass and pumps the exact volume of water needed from the rear reservoir based on pre-programmed ratios.
Can I put chicken broth or milk into the water tank?
No, you must never put broth, milk, oil, or seasonings in the water tank. These liquids clog the internal pump lines and cause bacterial growth. If you want to use broth, add it directly into the cooking pot using manual mode.
Is the KitchenAid rice cooker pot dishwasher safe?
The ceramic-coated cooking pot and steam basket are dishwasher safe on the top rack. However, hand washing with a soft sponge and mild soap helps maintain the nonstick ceramic surface for significantly longer.
How long does it take to cook white rice in this machine?
Standard long-grain white rice takes approximately 25 to 35 minutes from start to finish. Aromatic varieties like jasmine and basmati cook slightly faster, while short-grain sushi rice requires up to 40 minutes for complete starch hydration.
Can I cook steel-cut oats and quinoa in the KitchenAid rice cooker?
Yes, the machine features dedicated presets for quinoa, steel-cut oats, rolled oats, farro, lentils, and beans. Each program applies customized water ratios and heating curves tailored to that specific ingredient’s density and bran structure.
How often should I descale the water dispensing system?
You should descale the machine every three to six months depending on your water hardness. If you notice the pump running slower or dispensing incorrect water volumes, run a descaling cycle using a 1:1 distilled white vinegar solution immediately.
Does the cooker switch to Keep Warm automatically?
Yes, the machine automatically enters “Keep Warm” mode once the cooking and steaming phases finish. It maintains safe serving temperatures for up to 6 hours without drying out the bottom layer of grain.
What should I do if my rice turns out too firm or too soft?
If your grains are consistently too firm, adjust the custom ratio slider to add 5% to 10% more water on your next batch. If grains are too soft or mushy, drain your rinsed rice more thoroughly and lower the ratio slightly.